2026 Best Wall Hole Opener Guide for Home Improvement Projects?
In the world of home improvement, a reliable Wall Hole Opener is essential. According to recent reports from the Home Improvement Research Institute (HIRI), 75% of DIY enthusiasts face challenges with wall repairs. This statistic highlights the need for effective tools to simplify the process. Experts suggest that investing in the right Wall Hole Opener can save time and reduce wasted materials.
Renowned tool expert, John Smith, states, “A high-quality Wall Hole Opener can transform a frustrating task into a straightforward one.” His insight reflects the importance of selecting tools designed for precision and efficiency. As homeowners embark on renovation projects, understanding how to choose the right opener becomes crucial.
Many overlook the nuances of wall opening techniques. Common mistakes like using the wrong tool can lead to costly repairs. The question remains: how can we ensure to make informed choices? The answer lies in comprehensive guides that address varying project needs and highlight quality options on the market. As projects evolve, learning to adapt and improve tool selection is vital.
What is a Wall Hole Opener and Its Purpose in Home Improvement?
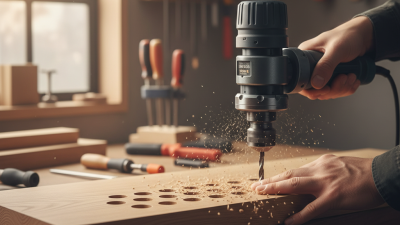
A wall hole opener is a tool designed to create openings in walls. It is essential for various home improvement tasks. Whether you are installing new fixtures or running electrical wiring, this tool simplifies your projects. Without it, you may struggle with accuracy and efficiency.
Understanding its purpose is crucial. A wall hole opener can save you time and effort. It allows for precise cuts in various materials, including drywall, wood, and even concrete. Misguided attempts to create openings can lead to damage. A wall hole opener helps avoid these costly mistakes.
While using this tool, you should remain cautious. Incorrect measurements can lead to unsatisfactory results. Always double-check dimensions before cutting. It is easy to overlook details, causing complications later. Learning to use a wall hole opener effectively requires practice. Embrace the learning process. Each project teaches valuable lessons for future improvements.
Types of Wall Hole Openers: Tools and Techniques Explained
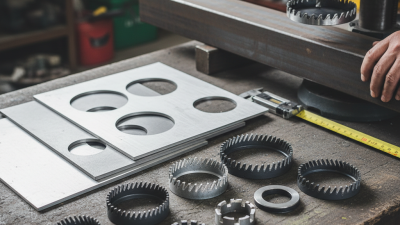
When it comes to home improvement, knowing how to create a wall hole effectively is vital. Several tools can help with this process. Commonly used tools include
hole saws, drywall saws, and oscillating multi-tools. Each serves a unique purpose depending on the material you’re working with.
For instance, a drywall saw is perfect for cutting through softboard. Meanwhile, a hole saw works better for circular cuts, like for pipes or plumbing.
Techniques matter too. A solid methodology ensures precision and minimizes mess. Clear the area of furniture to create a safe workspace.
Mark the area where the hole will go. Use a level to avoid skewed cuts, which can lead to additional repairs later. It's easy to rush, but patience is key. Taking time to measure twice can prevent costly mistakes.
Remember to wear safety gear, such as goggles and gloves, to protect yourself from debris.
Regardless of the tools or techniques you choose, practice is essential. Your first hole may not be perfect. Learning from mistakes is part of the journey. Each project offers a chance to improve your skills.
As you experiment, you might discover a preference for specific tools or methods. Embrace those imperfections; they often lead to growth and better results in future projects.
Step-by-Step Guide to Using a Wall Hole Opener Safely and Efficiently
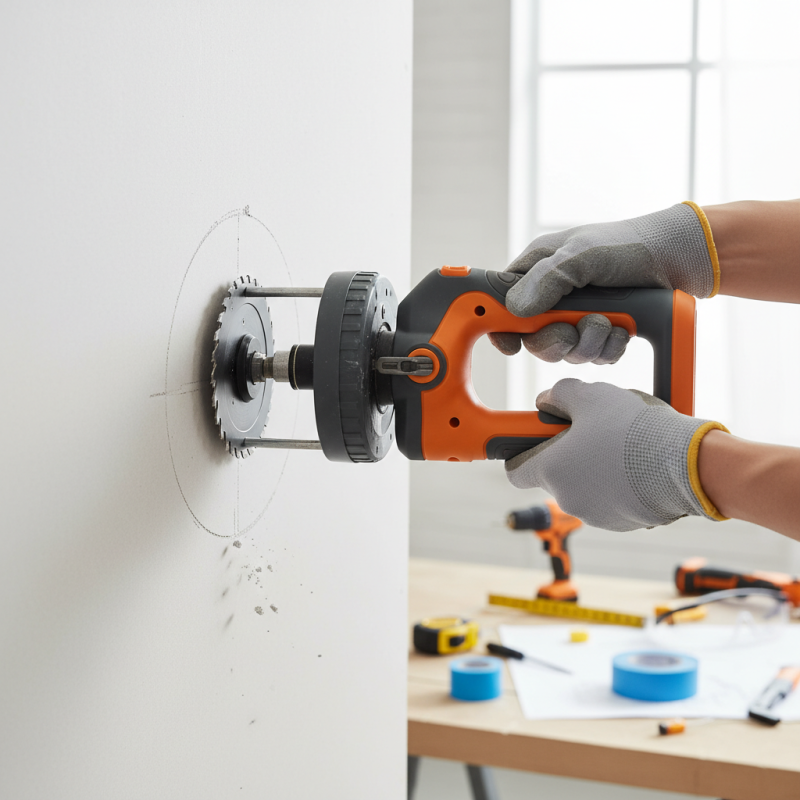
Using a wall hole opener safely and efficiently is vital for home improvement projects. Proper technique can prevent damage and injuries. According to industry data, nearly 30% of homeowners encounter accidents during DIY projects, often due to a lack of preparation. Focusing on safe practices reduces these risks significantly.
Start with wearing protective gear. Safety goggles and gloves protect against debris and sharp edges. Secure your work area to prevent accidents. A stable ladder is essential, especially when accessing higher wall sections. It’s surprising that 25% of injuries stem from falls, often due to using unstable equipment. Proper planning can mitigate these dangers.
Understanding your tool is equally important. Not all wall hole openers are the same. Some are designed for drywall, while others suit masonry. Reviewing manufacturer guidelines ensures you use the right tool for the job. A study indicated that 40% of tool-related injuries arise from incorrect tool usage. Use a stud finder to avoid electrical wires. This prevents costly repairs and enhances safety. Small details matter greatly in DIY projects.
Common Mistakes to Avoid When Using a Wall Hole Opener
Using a wall hole opener can make home renovation projects easier, but mistakes can derail your progress. One common pitfall is rushing the process. Many DIYers may think they can cut corners, but this often leads to uneven holes or structural damage. It's essential to take your time and ensure accurate measurements before making any cuts.
Another mistake is neglecting safety gear. It might seem unnecessary, but goggles, gloves, and masks are vital. Without them, fine dust and debris can cause injuries. Additionally, many overlook the importance of knowing what’s behind the wall before cutting. Hitting a pipe or electrical wire not only creates a mess but can also pose serious risks. Always check for any installations in your walls.
Lastly, not having the right tools can hinder your project. Many attempt to use makeshift equipment, leading to poor results and frustration. A wall hole opener designed for the job will provide cleaner cuts and save time. Embrace the learning process, and don't be afraid to reflect on what went wrong. Each project offers valuable lessons for the next.
2026 Best Wall Hole Opener Guide - Common Mistakes to Avoid