10 Essential Tips for Using a Hole Saw Like a Pro
In the realm of woodworking and construction, mastering tools is essential for achieving precision and efficiency. The Hole Saw represents a pivotal instrument in this toolkit, predominantly used for creating clean, circular holes in various materials. According to a recent report by the Home Improvement Research Institute (HIRI), the demand for specialized cutting tools like the Hole Saw has surged by 27% over the past five years, attributed to the booming DIY and home renovation trends. Understanding how to effectively utilize a Hole Saw can significantly impact the quality of work and overall project outcomes.
Industry expert Jack Thompson, a seasoned carpenter with over 20 years of experience, emphasizes the importance of technique when using a Hole Saw: "The right approach not only enhances the finish but also prolongs the lifespan of your tools." His insights highlight that successful use of a Hole Saw requires not only knowledge of the tool but also an awareness of best practices. This guide aims to enumerate ten essential tips for using a Hole Saw like a pro, ensuring that both amateurs and seasoned professionals can maximize their results while minimizing the risk of mishaps.
Choosing the Right Hole Saw for Your Project Requirements
When selecting the right hole saw for your project, it's essential to consider both the material you will be working with and the type of hole you need to create. The thickness of the material should influence the size and depth of the hole saw you choose. For instance, a thicker material may require a more robust hole saw designed to handle tougher cuts, while softer materials such as wood allow for greater versatility in size and type.
Additionally, the diameter of the hole saw is crucial. Depending on the purpose of the hole—whether for plumbing, electrical work, or ventilation—you will need to select a diameter that meets your project requirements. A range of sizes is typically available, from small holes for wiring to larger openings for pipes or ducts. Don't forget to ensure compatibility with your drill, as the arbor size and attachment method can vary significantly between different hole saw models, impacting the ease of use and the quality of the cut. Choosing the appropriate hole saw involves a clear understanding of both your project's needs and the materials involved, which sets the foundation for a successful and professional result.
Preparing Your Materials and Tools for Hole Saw Usage
When preparing your materials and tools for using a hole saw, the first step is to gather all necessary items to ensure a smooth and efficient process. Start with assessing the workpiece you will be drilling into, whether it's wood, metal, or plastic. Each material may require different types of hole saws and prep techniques. Make sure to select a hole saw that matches the diameter needed for your project.
Additionally, having a suitable drill to handle the hole saw's power requirements is crucial. A drill with variable speed settings will give you better control over the drilling process.
Safety is another critical aspect during preparation. Always equip yourself with proper personal protective equipment such as safety goggles and gloves to shield against debris. Before starting, secure your workpiece properly on a stable surface to prevent any movement while drilling. This stability not only ensures safety but also enhances the precision of your cuts. Lastly, check that your hole saw is sharp and in good condition to avoid any excessive resistance or burning of materials during use. Taking these preparatory steps can significantly elevate your hole saw experience and yield professional results.
Step-by-Step Guide to Safely Operating a Hole Saw
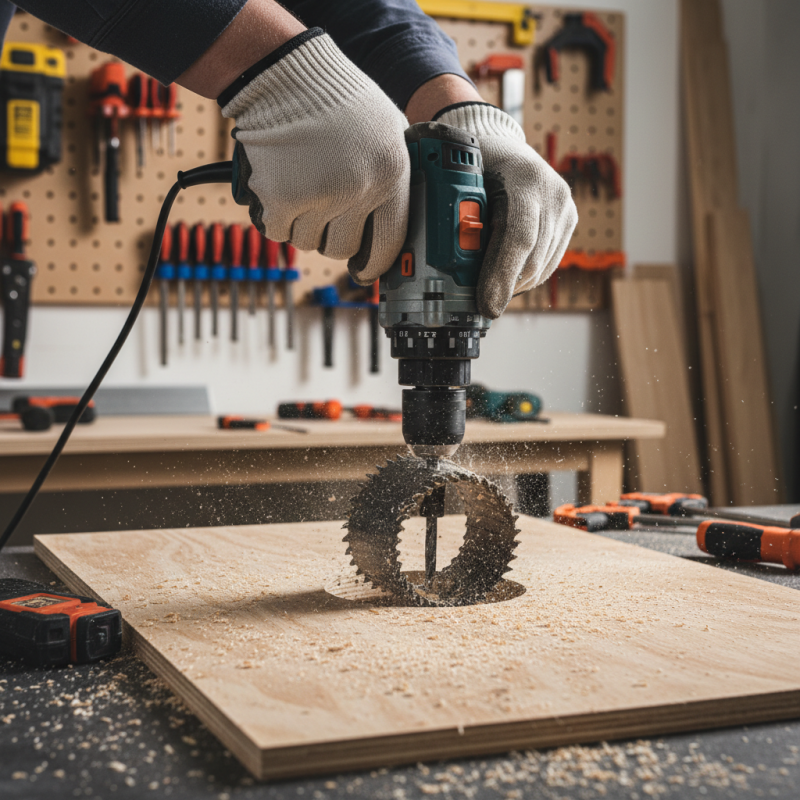
When operating a hole saw, safety should always be your top priority. Start by wearing appropriate personal protective equipment, including safety glasses and gloves. Ensure that the workpiece is securely clamped down to prevent it from moving during the cutting process. This stability will significantly reduce the risk of accidents and improve the precision of your cuts. Before you begin drilling, take a moment to mark the center point of your cut clearly; this will serve as a guide and help you maintain control of the saw.
Once you're ready to start, use the right speed and pressure. It's essential to maintain a slow and steady pace, allowing the hole saw to do the work without forcing it. Applying too much pressure can lead to overheating, blade damage, or even kickback. Additionally, periodically withdrawing the hole saw from the material will help clear out shavings and prevent clogging, ensuring a smoother cutting experience. Always keep both hands on the drill for better control, and when finished, handle the saw carefully as it may be hot. Following these guidelines will help you operate a hole saw safely and effectively, enhancing your DIY or professional projects.
Techniques for Maintaining and Caring for Your Hole Saws
Maintaining and caring for your hole saws is crucial for ensuring their longevity and performance. According to a report by the American National Standards Institute (ANSI), the proper care of cutting tools can extend their lifespan by up to 50%. To effectively maintain your hole saws, always clean them after each use. Metal shavings and debris can accumulate and affect their cutting efficiency, leading to premature wear. A simple scrub with a nylon brush and some soapy water can significantly improve their condition, ensuring they are ready for future projects.
Proper storage is another essential aspect of maintaining hole saws. A study from the European Cutting Tool Federation highlighted that organized storage reduces the risk of damage by approximately 40%. Use a dedicated toolbox with inserts to keep your hole saws from rattling against each other, which can dull their edges. Additionally, keep them away from moisture to prevent rust formation, which can compromise their effectiveness. Regularly inspecting the teeth for signs of dullness or chipping can help you identify when it’s time for resharpening or replacement, ultimately saving you time and ensuring high-quality cuts.
10 Essential Tips for Using a Hole Saw Like a Pro
| Tip Number |
Tip Title |
Description |
| 1 |
Choose the Right Size |
Select a hole saw that matches the diameter required for your project. |
| 2 |
Use Lubrication |
Apply cutting oil or water to reduce friction and heat buildup. |
| 3 |
Drill at the Right Speed |
Use a slow to medium speed for best results and to prolong the life of the hole saw. |
| 4 |
Clear Debris Regularly |
Stop periodically to remove sawdust and debris from the hole saw. |
| 5 |
Maintain a Steady Pressure |
Apply consistent pressure to ensure continuous cutting without forcing the saw. |
| 6 |
Select the Right Material |
Ensure your hole saw is suitable for the material you are cutting, whether it's wood, metal, or plastic. |
| 7 |
Inspect Your Hole Saw |
Regularly check for wear and tear and replace if necessary to maintain cutting efficiency. |
| 8 |
Use a Pilot Drill |
Consider using a pilot drill bit to help start the hole and guide the hole saw. |
| 9 |
Store Safely |
Keep your hole saws in a secure and organized place to prevent damage and keep them sharp. |
| 10 |
Follow Manufacturer Guidelines |
Always follow specific care and usage instructions provided by the manufacturer to ensure best results. |
Common Mistakes to Avoid When Using a Hole Saw
When using a hole saw, one of the most common mistakes is inadequate preparation of the material. Before starting, it’s crucial to determine the thickness and density of the material you're cutting. Many users dive in without checking, leading to difficulty in cutting or even damage to the saw. Additionally, failing to secure the material properly can cause it to shift during the cutting process, resulting in uneven holes and a wasted workpiece. Always ensure that the material is clamped down securely and that you’ve selected the appropriate type of hole saw for the job.
Another frequent error is neglecting to apply the correct amount of pressure. Many users tend to press down too hard, thinking it will expedite the process. However, excessive pressure can overheat the saw or cause it to bind, leading to an increased risk of breakage. Instead, it’s best to maintain steady, even pressure, allowing the saw to do the cutting. Furthermore, not using lubrication or cutting fluid when dealing with tougher materials can also hinder performance and lead to premature wear. Taking the time to ensure proper technique can greatly enhance the efficiency and quality of your cuts.