How to Use an Adjustable Hole Saw Safely?
Using an Adjustable Hole Saw can make clean openings in wood, plastic, and selected thin metals. However, convenience does not remove risk. The adjustable cutters, pilot drill, and locking mechanism must work together correctly. A loose blade can wobble, catch, or damage the workpiece.
Tooling educator Peter Jenkins puts it plainly: “Let the teeth cut steadily; never make force your safety plan.” That principle deserves attention. Before drilling, inspect the arbor, guide bit, cutting blades, and retaining screws. Replace damaged parts. Tighten every adjustment with the correct tool. Small errors matter.
Secure the material on a stable surface. Do not hold a loose board against your knee. Mark the center clearly, then check for hidden cables, pipes, or fasteners. Choose a drill speed suitable for the material and cutter size. Start slowly, keeping both hands on the drill. Allow the pilot bit to establish control before increasing pressure.
Wear eye protection. Add hearing protection during extended work. Keep sleeves, hair, and gloves away from rotating parts. Stop immediately if the saw vibrates, smells hot, or produces uneven chips. It may be tempting to continue. That is often the wrong choice.
An Adjustable Hole Saw is useful, but it is not forgiving. Beginners sometimes focus on the diameter and ignore the arbor. Experienced users still make mistakes. I do too, especially when rushing a repeated cut. This guide explains safer setup, controlled drilling, blade adjustment, material selection, and practical checks for cleaner results. Safety improves when each cut receives the same careful attention.
Identify Adjustable Hole Saw Parts and Hazards Under OSHA 1910.212
How to Use an Adjustable Hole Saw Safely?
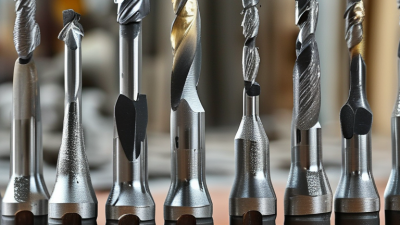
An adjustable hole saw usually includes an arbor, pilot drill, sliding cutting arms, locking screws, and exposed teeth. Check every part before mounting it. Loose arms can shift during rotation. The pilot drill should extend slightly beyond the cutting edge. Never use a damaged arbor or a cracked blade. OSHA 1910.212 requires effective guarding against point-of-operation hazards, rotating parts, and flying chips. A hole saw guard or suitable barrier should prevent accidental contact where practical.
The main hazards are tooth contact, kickback, ejected fragments, entanglement, and airborne dust. Secure the workpiece firmly, then select a speed suitable for its material and diameter. Keep both hands away from the rotating assembly. Do not wear loose clothing or gloves near a rotating spindle. Eye protection is essential; face protection may be needed for brittle materials. The Bureau of Labor Statistics recorded about 2.6 million nonfatal workplace injuries and illnesses in private industry during 2023. That broad figure does not isolate hole saw incidents, but it shows why routine controls matter.
Tips: Inspect the locking screws twice. Start slowly. Stop if vibration increases. Use hearing protection in noisy areas and control dust with local extraction. Mark the cutting circle clearly. Remove power before clearing jammed material. A common mistake is tightening the arbor while the tool remains connected. It feels efficient, but it creates an avoidable exposure. Recheck the adjustment after the first few seconds; even careful setup can be imperfect.
Select ANSI/ISEA Z87.1 Eye Protection and Secure the Workpiece
An adjustable hole saw can grab suddenly when its blades meet uneven material. Eye protection must be selected before the tool starts. Choose protectors marked ANSI/ISEA Z87.1 for impact-rated performance. For high-impact cutting, look for the Z87+ marking. Coverage matters. Safety glasses alone may leave gaps beside the cheeks, especially when chips rebound from metal. A face shield can add protection, but it should not replace safety glasses. CDC/NIOSH reports that about 2,000 U.S. workers suffer job-related eye injuries requiring medical treatment each day. That figure makes a small cutting task less casual.
Secure the workpiece with a clamp, vise, or suitable fixture. Never hold a loose board or sheet by hand while guiding the saw. Check that the pilot bit, blade teeth, and arbor are tight. Remove power before making adjustments. Keep both hands away from the rotating assembly, and position your body outside the likely chip path. I still see people focus on speed and forget the exit side of the cut. That is an easy mistake.
Use steady pressure and let the teeth cut without forcing them. Stop if the saw vibrates, binds, or produces unusual noise. Inspect eye protection for scratches, cracks, or a poor seal before each use. OSHA’s eye and face protection guidance emphasizes selecting PPE for the specific hazard, not using one type for every task. ANSI/ISEA Z87.1 helps define performance and marking requirements, but correct fit and disciplined work habits remain personal responsibilities. A standard cannot compensate for a careless grip.
Set Blade Diameter and RPM Using the Manufacturer’s Cutting Chart
An adjustable hole saw becomes safer when its diameter and speed match the cutting chart.
Measure the blade tips with calipers, not guesswork. A small error changes the required RPM and cutting load. Select the material first, then find the recommended surface speed and RPM in the manufacturer’s chart.
For a quick check, RPM equals cutting speed multiplied by 12, divided by π and diameter in inches.
Larger holes need slower rotation. Slow down.
Clamp the workpiece firmly, especially thin sheet metal.
Keep both hands away from the rotating blade. Wear eye protection, hearing protection, and fitted work clothing. The U.S. Bureau of Labor Statistics recorded about 2.6 million nonfatal workplace injuries and illnesses in private industry during 2023. That figure covers many hazards, but it reinforces one point: routine tools still require controlled procedures.
Start the cut lightly, then increase pressure only after the pilot drill creates a stable track.
Stop immediately if the saw chatters, binds, or produces blue chips.
Check twice.
A cutting chart is not a guarantee for every drill, battery condition, or material grade.
I sometimes see users choose a familiar RPM instead of reading the chart. That shortcut feels efficient, but it can overheat teeth and twist the tool.
Recheck the diameter after adjustment, confirm the chuck is tight, and clear chips only after the drill stops completely.
Start Squarely and Control Feed to Reduce Binding and Kickback
How to Use an Adjustable Hole Saw Safely?
Start Squarely and Control Feed to Reduce Binding and Kickback
Before cutting, inspect the adjustable hole saw for loose blades, damaged teeth, or missing fasteners. Wear eye protection, hearing protection, and snug work clothing. Secure the workpiece firmly, especially when drilling thin boards or sheet material. A moving workpiece can turn a small mistake into a sudden hazard.
Set the saw against the surface with its pilot bit centered on the marked point. Keep the tool square to the material. Do not begin at an angle. That habit can make the cutting edges grab unevenly. Start at a slow speed and let the teeth create a clean circular track. Keep both hands on the tool when possible. Your stance should leave room to move away if the saw catches.
Feed the saw with steady, light pressure. Forcing it increases heat, binding, and kickback. Pause often to clear chips, particularly in deep or resinous material. If the motor slows, the saw vibrates, or the cut smells hot, release the trigger and wait for the blade to stop. Never pull a spinning saw from a rough cut. I have found that rushing the final section causes the most trouble. The opening may look nearly complete, but the remaining fibers can still resist sharply. Check the blade alignment again before continuing. A small adjustment is safer than a stronger push.